
Vector and raster images explained
January 1, 2026
Vector and raster. Terms you might of heard from sign makers and printers alike. But what the heck does it all mean?
“Thanks for the logo, but do you have an EPS file?”
Sound familiar? How about getting asked again once you’ve provided the EPS file that you converted from your JPG.
In this brief insight, I’ll go over how vector images are different from the commonly used raster images and why. I’ll go over what file types to expect for both as well as how to convert a raster to a vector.
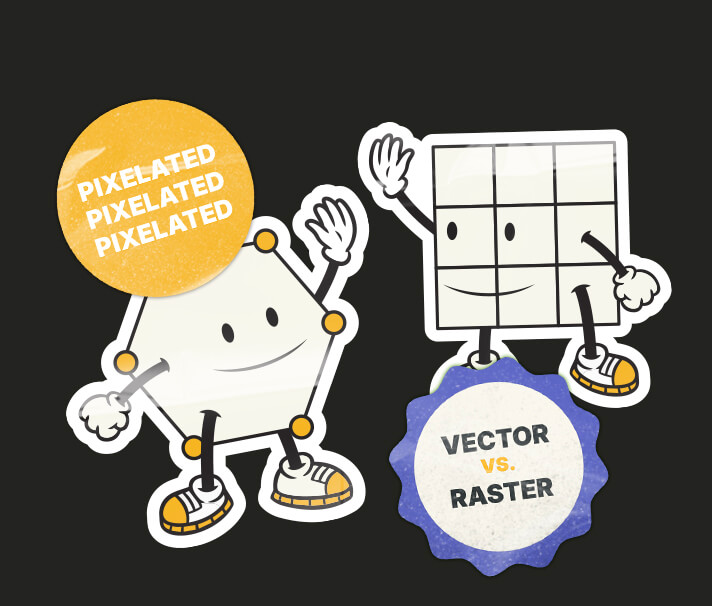
So what’s the difference between vector and raster?
Firstly, most people understand raster images more than vector. Raster images are made up from pixels. When you zoom in, you see all the little tiny squares making up that image as if you’ve just booted up a Minecraft map. If an image is small or has a low resolution, those pixels will be visible with much less zooming in. In addition it will be absolute naff for printing.
On the technical side, as a rule of thumb, 300dpi is good for printing while 72dpi is good for websites for quicker loading. Some websites like Facebook will compress images automatically so that they have a lower resolution.
When printing photographs, which will always be in raster format, make sure that you’re using original uncompressed versions straight from the camera. If you’re printing a logo, text or even some digital illustrated artwork, then you’ll want to make sure that the file is in vector format for a finish that’s as crisp as a bag of Salt & Shake.
“But what’s a vector if it’s not pixels” I hear you say. Well a vector is basically make up of points (or nodes), curves and strokes as well as fills and gradients. In addition, most fonts are created using vector formatting.
The big difference between vector and raster is quality when big. When you zoom into a vector file you’ll constantly be seeing a smooth line as an opposed to a jagged pixelated one of a raster image, which is why logos are professionally designed in vector format.
“So does that mean vector is better than raster?” Not really, as raster has its own purposes. When you look at vector artwork it can be quite simple looking compared to that of a photograph in raster format. To recreate a photo in vector would be so time consuming and unnecessary as most cameras can produce high enough quality for standard size printing.
So now you know what sets them apart, we can go over what they look like in file types.
File types for vector and raster images
As mentioned previously, a lot of sign makers will request EPS files. Some may request SVG or even PDF or even AI (Adobe Illustrator file…not to be confused with artificial intelligence).
These file formats can all hold vector format artwork, BUT!!!…they can also hold raster data, making it hard to find out if the file is a true vector format. The best thing to do to find out, is open the file (if you can) and keep zooming into an area of contrasting colours. If there is no pixelation as you keep zooming in, then congratulations, you have a true vector file.
Now without leaving raster files formats out, a few formats you can expect to see are PNG, JPG, GIF, TIFF, PSD, RAW and even HEIC. All these file formats cannot hold vector data. You can copy a vector graphic like a logo over to the file, or even type text on it, but the vector format will simply convert to raster.
So now you’re probably wondering “how can I turn my PNG logo into a true vector EPS file?” Let’s read on…
How can I turn my raster file into a vector?
Yeah, ok…so this is the tricky part and I've created a more detailed approach about it here.
One might simply open up the file in a basic image software and save as a vector format, but this won’t work. Vector can go to raster easily, but raster to vector not so much. Usually a graphic designer can help out with this dilemma and will usually do it in one of two ways.
The most common and efficient way is to use something like Adobe Illustrator’s Image Trace tool. If the original raster image is of a good enough resolution and usually quite simple with a limited amount of colours, then the software can be worked to simply convert it to vector. If the image isn’t the best of quality, it can leave some strange blobby bits on the image.
The second approach is to redraw the entire graphic. This is a more time consuming job especially if it’s a more intricate image. In addition, if there is text in the logo, it’s best that the font is known and easily accessible so that it can be retyped.
Nowadays however, there are some online tools that can do the image trace for you and some do look pretty damn impressive. They often show you a before and after and you can check for any imperfections. They usually do come at a cost however but it’s not that pricey.
All in all, when getting your logo or vector style graphics, make sure that you request vector formats as well from your designer. I myself make sure that all my vector artwork is exported in PDF format so that vector remain intact and with all my logo designs I make sure to export a whole suite of vector and raster file formats, including solid colour versions.
Need a logo design? Get in touch.

Adam Hayles
Freelance Graphic Designer
15+ years in the graphic design world with a desire to provide brands with a fresh upbeat visual personality using design, illustration and animation.
Vector and raster images explained
January 1, 2026
Vector and raster. Terms you might of heard from sign makers and printers alike. But what the heck does it all mean?
“Thanks for the logo, but do you have an EPS file?”
Sound familiar? How about getting asked again once you’ve provided the EPS file that you converted from your JPG.
In this brief insight, I’ll go over how vector images are different from the commonly used raster images and why. I’ll go over what file types to expect for both as well as how to convert a raster to a vector.
So what’s the difference between vector and raster?
Firstly, most people understand raster images more than vector. Raster images are made up from pixels. When you zoom in, you see all the little tiny squares making up that image as if you’ve just booted up a Minecraft map. If an image is small or has a low resolution, those pixels will be visible with much less zooming in. In addition it will be absolute naff for printing.
On the technical side, as a rule of thumb, 300dpi is good for printing while 72dpi is good for websites for quicker loading. Some websites like Facebook will compress images automatically so that they have a lower resolution.
When printing photographs, which will always be in raster format, make sure that you’re using original uncompressed versions straight from the camera. If you’re printing a logo, text or even some digital illustrated artwork, then you’ll want to make sure that the file is in vector format for a finish that’s as crisp as a bag of Salt & Shake.
“But what’s a vector if it’s not pixels” I hear you say. Well a vector is basically make up of points (or nodes), curves and strokes as well as fills and gradients. In addition, most fonts are created using vector formatting.
The big difference between vector and raster is quality when big. When you zoom into a vector file you’ll constantly be seeing a smooth line as an opposed to a jagged pixelated one of a raster image, which is why logos are professionally designed in vector format.
“So does that mean vector is better than raster?” Not really, as raster has its own purposes. When you look at vector artwork it can be quite simple looking compared to that of a photograph in raster format. To recreate a photo in vector would be so time consuming and unnecessary as most cameras can produce high enough quality for standard size printing.
So now you know what sets them apart, we can go over what they look like in file types.
File types for vector and raster images
As mentioned previously, a lot of sign makers will request EPS files. Some may request SVG or even PDF or even AI (Adobe Illustrator file…not to be confused with artificial intelligence).
These file formats can all hold vector format artwork, BUT!!!…they can also hold raster data, making it hard to find out if the file is a true vector format. The best thing to do to find out, is open the file (if you can) and keep zooming into an area of contrasting colours. If there is no pixelation as you keep zooming in, then congratulations, you have a true vector file.
Now without leaving raster files formats out, a few formats you can expect to see are PNG, JPG, GIF, TIFF, PSD, RAW and even HEIC. All these file formats cannot hold vector data. You can copy a vector graphic like a logo over to the file, or even type text on it, but the vector format will simply convert to raster.
So now you’re probably wondering “how can I turn my PNG logo into a true vector EPS file?” Let’s read on…
How can I turn my raster file into a vector?
Yeah, ok…so this is the tricky part and I've created a more detailed approach about it here.
One might simply open up the file in a basic image software and save as a vector format, but this won’t work. Vector can go to raster easily, but raster to vector not so much. Usually a graphic designer can help out with this dilemma and will usually do it in one of two ways.
The most common and efficient way is to use something like Adobe Illustrator’s Image Trace tool. If the original raster image is of a good enough resolution and usually quite simple with a limited amount of colours, then the software can be worked to simply convert it to vector. If the image isn’t the best of quality, it can leave some strange blobby bits on the image.
The second approach is to redraw the entire graphic. This is a more time consuming job especially if it’s a more intricate image. In addition, if there is text in the logo, it’s best that the font is known and easily accessible so that it can be retyped.
Nowadays however, there are some online tools that can do the image trace for you and some do look pretty damn impressive. They often show you a before and after and you can check for any imperfections. They usually do come at a cost however but it’s not that pricey.
All in all, when getting your logo or vector style graphics, make sure that you request vector formats as well from your designer. I myself make sure that all my vector artwork is exported in PDF format so that vector remain intact and with all my logo designs I make sure to export a whole suite of vector and raster file formats, including solid colour versions.
Need a logo design? Get in touch.
Adam Hayles
Freelance Graphic Designer
15+ years in the graphic design world with a desire to provide brands with a fresh upbeat visual personality using design, illustration and animation.